Mbira or Finger Piano
May 22, 2020 — faemom
Things You Can Dye For Crafts
May 19, 2020 — faemomSome Fun Outdoor Crafts
May 15, 2020 — faemom


Upcycle Broken Crayons
May 14, 2020 — faemom
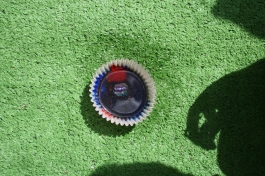
 These left a grease stain, so hence the paper plate or something underneath the cupcake wrapper.
Mail Time!
May 13, 2020 — faemomSend mail. It’s fun.
Let’s Do Some Origami
May 12, 2020 — faemomLet me introduce you to some easy origami. Since I have a hard time trying to fold straight, so if I say this is easy, it’s easy. Origami is a fun activity to do inside, teaching kids (and adults) patience, persistence, and following the directions.
- A Whale
2. A Doll

Step 1. Fold the left (or right, just pick a side) a third of the way into the paper.

Step 2. Turn the paper so your folded piece is at the bottom of the paper. Fold your right (or left, just pick a side) a third of the way into the paper. Turn the paper so the white diamond shape is at the top.

Step 3. Flip the paper over. Fold the bottom corner up.

Step 4. Flip the paper over and draw a face. You can fold the top corner or leave your person with a point.
3. Another Doll. This is the one I used to make for my babysitting chargers.

Step 1. Fold the paper corner to corner.

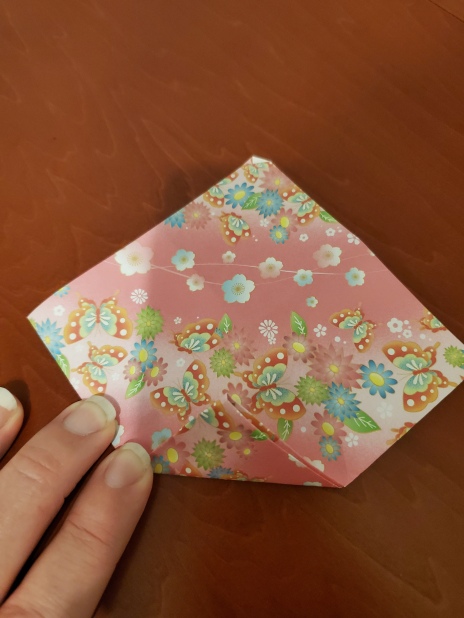
Step 2. Open up the paper. Fold the left corner to the middle. Fold the right corner to the middle.

Step 3. Fold the bottom corner up all the way until the fold is along where the corners met in the middle. It looks like a neat triangle.

Step 4. Fold the bottom again, nearly in half. Looks like a cool boat. It sadly doesn’t float.

Step 5. Flip the paper over. Those corners sticking out are the arms. Fold them in.

Step 6. Draw a face. Fold the corner back for a flat head. The flat head is suppose to be a boy, and the point is suppose to be a girl. I’m sure it doesn’t matter.

Fun with paper!
More ideas to come. As I finish grading essays and wrapping the school up. Stay safe! Stay sane!
Easy Crafts: Origami
May 1, 2020 — faemomFirst I suck at folding; so when I tell you it’s easy, believe me. Like I can’t do the crane that everyone does. “It’s so easy.” No, it’s not. “See, just fold here and here and here.” And they lift up this beautiful crane, and I lift up a colorful wad of paper, perfect for making baskets with the trash can.
It’s why I keep all the cranes kids make for me. Only in high school, the kids make them out of tiny candy wrappers. And I’m doubly-impressed. Also as high school teacher, you don’t get many gifts or pictures, so you really treasure the ones you do get.
When I was a cool teenage babysitter, this was always a fun craft. I would fold pieces for the kids, and we would make all sorts of stories and plays. As my chargers got older, I taught them how to fold the simple pieces…. until they learned to fold cranes and laugh when I would be at a loss as they tried to teach me.
My nemesis, folks, paper cranes.
Some easy one origami.
1. The dog. (a favorite among babysitting charges and Cub Scouts)
2. The cat. (Another favorite)
3. The whale.
4. The fox.
5. The elephant.
Here’s a site for them: https://www.origamiway.com/easy-origami.shtml
7. The house. I would fold this for a set piece, but I don’t remember if it was easy or not.
8. The prince.
9. The princess.
My original origami book that I had as a teenager is in deep storage. I cannot find a site for the prince and princess. For many days, I looked. I kept folding the paper in different ways until I figured it all out again.
So coming soon. Pictures and directions.
If you don’t have fancy paper, cut a square out of regular paper. I don’t recommend construction paper.
More to come. Good luck. Stay safe. Stay sane.
Let’s Play with Soap
April 30, 2020 — faemomI have so many random crafts and science projects. Seriously, so many. So it shouldn’t surprise anyone that I have ones for soap.
We use soap in Girl Scouts and Cub Scouts. And now that I’m writing this, I can think of a couple more that will have to wait until I find the directions. Hopefully they aren’t in deep storage….
While I know many states are letting people out into the world, I know many more are not. It’s frustrating and chaotic. But I still have plenty of crafts to share because before you know it, the kids will be out for summer.
1. Water and Oil and Soap. This is a fun little experiment to show kids what water does to oils. My Girl Scouts loved this. Take a zip lock back fill a 1/3 with water. Add enough oil (canola or whatever) to make a layer. Show the kids how the water and oil don’t get along. Then add dish soap. Dawn works the best. Make sure the bag is sealed. Like really make sure. Then shake it up. The water, oil, and soap combine because the soap binds with the oil. It’s more complicated than that, but yeah.
2. Make soap. You could buy soap and melt it and make it. OR you can save all those slivers of soap you’ve been using to really wash your hands. Melt them. I prefer the double broiler to slow microwaving. Pore into molds or into paper cups. Let cool. Pop them out of molds.
2.a I once made soap with toys in them. Lots of fun.
3. Carve soap. This is a Cub Scout activity. Whittle or carve shapes out of soap. I made templates from pictures online like a bear, a whale, a shell, and various simple shapes. We do this in 3rd grade in Cub Scouts. But using a plastic knife, soft soap, and adult supervision, you could probably do it younger.
4. Bubbles! My favorite memory is entertaining the boys when they were little and blowing enough bubbles to fill a mall court yard. It was magical.
5, Homemade bubbles. I lost my recipe. So try these: 4 cups warm water, 1/2 cup sugar, and 1/2 cup blue Dawn dish soap. Mix. OR 2 cups warm water, 1/3 cup dish soap, and 1/4 cup corn syrup. Mix.
6. Bubble wands. Pipe cleaners bent into a closed shape attached to another pipe cleaner, dowel, or stick.
Stay safe! Stay sane! More to come!
Morse Code Activities
April 27, 2020 — faemomYou want to know what’s fun? Secret codes.
Breaking them. Learning them. Making them.
Why do you think the Rosetta Stone is so cool? It broke a code.
Why save up box tops or bottle lids for that cool decoder ring? Breaking a secret code!
So while I hunt down my old Cub Scout and Girl Scout Handbooks, let’s start with Morse Code.
1. Teach Morse code. For fun. Or until we need to use it to coordinate a defense against aliens because they are hijacking our satellites.
2. Make secret messages of Morse code on paper. “Send” them to the kids. Let them “send” them to you. I remember a short story as a code where the Grandma made people ring her door bell in a code. It was SOS in Morse code. Do fun ones first. Wait on the “do your chores” message for later.
3. Make secret messages in Morse code with Legos. Or blocks.
4. Make secret messages in Morse code with noodles. Break up spaghetti or use long and short noodles. Glue noodles on paper. Or string them on a string.
5. Make secret messages with beads. Make cool jewelry with a special messages or words.

More to come! Stay safe! Stay sane!
Science and Art and Coffee Filters
April 24, 2020 — faemomHow about Science and Art!
I love art. And I love science. I love science demonstrations and experiments. I just like cool things. I like working with my hands. So we do a lot of art and a lot of science.
I’m sure I have pictures of these when the boys were little, and we did these. But I just spent 20 minutes going through hundreds of pictures. So I’ll find them the next time I search the pictures. Or maybe we’ll do some over the weekend. Mwhahaha.
1. Chromatography. Separate the pigments of markers. Fill a couple of glasses with water. Take a coffee filter and color it with markers. I have always had the boys leave the center white and leave a lot of the filter uncolored. But you can color the whole thing or make designs. Once the child is done coloring fold the coffee filter so the bottom is just touching the water. Eventually the water will climb the filter and separate colors or blend them together depending on your white space. Leave them to dry.

2. You can do this with different types of markers and test the different pigments. We did this in Scouts.
3. Now you have these cool works of art to hang everywhere.
4. Or flowers. Take a few filters and layer them. Fold them into a cone shape, giving the resemblance of a carnation. Tie the bottom with a pipe cleaner.
5. Or butterflies. Take one filter. Fold it in half. Fold a pipe cleaner in half. Put the pipe cleaner up the middle of the filter like you’re cutting the filter in half with the pipe cleaner. Scrunch the filter to form to wings and twist the pipe cleaner at the top to hold the wings and create antennas.
6. Butterflies using 2 filters. Fold both filters in half. Put them straight edge to straight edge and take the pipe cleaner and copy the instructions.
7. Suncatchers. Cut the filters into pieces. Cut a piece of clear contact paper in any shape. Let the child decorate the contact paper with pieces. Cover the pieces with contact paper.
8. Mosaics. Cut the filter into pieces. Let the child glue the pieces in interesting shapes.
More to come stay safe and stay sane!


